Removing wallpaper can feel like a daunting task, especially if you’re dealing with stubborn adhesive or multiple layers of paper. But trust me, it doesn’t have to be overwhelming. Over the years, I’ve tackled my fair share of wallpaper removal projects—some went smoothly, while others required a bit more elbow grease. Through trial and error, I’ve discovered four tried-and-true methods that make the process easier, faster, and less frustrating.
Whether you’re renovating your home, updating a room, or simply tired of outdated wallpaper, this guide will walk you through the best techniques for removing wallpaper. From soaking and steaming to scoring and using chemical solutions, we’ll cover everything you need to know to get the job done right. Let’s dive in!
1. Soaking Method: The Classic Approach
The soaking method is one of the most common ways to remove wallpaper, especially if the paper is water-soluble. It involves softening the adhesive by applying moisture, making it easier to peel off.
What You’ll Need:
- A spray bottle or garden sprayer
- Warm water
- Dish soap (optional)
- A sponge or cloth
- A putty knife or scraper
Steps:
- Prepare the Room: Cover floors and furniture with drop cloths or plastic sheets to protect them from water and debris. Turn off electricity to outlets and switches to avoid accidents.
- Score the Wallpaper: Use a scoring tool (like a perforation roller) to create small holes in the wallpaper. This allows water to penetrate the surface and reach the adhesive underneath.
- Apply Water: Mix warm water with a few drops of dish soap in a spray bottle. Generously spray the solution onto the wallpaper, focusing on one section at a time. Let it soak for 5–10 minutes.
- Scrape It Off: Once the paper has softened, use a putty knife or scraper to gently peel it away. If the adhesive remains sticky, reapply water and repeat the process.
Why It Works:
This method is effective for older wallpapers or those with water-based adhesives. However, it may not work as well on vinyl or heavily coated papers, which resist moisture.
2. Steaming Method: For Stubborn Walls
If soaking alone isn’t cutting it, steaming is an excellent alternative. Steam loosens the adhesive by generating heat and moisture, making it ideal for tougher jobs.
What You’ll Need:
- A wallpaper steamer (available for rent or purchase)
- A scraper or putty knife
- Towels or rags
Steps:
- Set Up the Steamer: Fill the steamer with water according to the manufacturer’s instructions and let it heat up.
- Test a Small Area: Start with a corner or inconspicuous spot to ensure the wall can handle the heat without damage.
- Apply Steam: Hold the steamer plate against the wallpaper for 10–15 seconds to loosen the adhesive. Move slowly across the wall, working in small sections.
- Peel and Scrape: As the adhesive softens, use a scraper to remove the wallpaper. Be patient—steaming takes time but yields great results.
Why It Works:
Steam penetrates deeply into the adhesive, breaking it down effectively. This method is particularly useful for non-porous wallpapers like vinyl or foil-backed varieties.
3. Chemical Solution Method: Quick and Efficient
For those who want a quicker solution, chemical wallpaper removers are a game-changer. These products dissolve adhesives, making removal much easier.
What You’ll Need:
- Commercial wallpaper remover (available at hardware stores)
- A spray bottle or paint roller
- Protective gloves and goggles
- A scraper or putty knife
Steps:
- Ventilate the Area: Open windows and doors to ensure proper airflow. Wear gloves and goggles to protect yourself from chemicals.
- Mix the Solution: Follow the product instructions to dilute the remover with water. Some solutions come pre-mixed, while others require preparation.
- Apply the Solution: Use a spray bottle or roller to apply the remover evenly over the wallpaper. Allow it to sit for the recommended amount of time (usually 10–15 minutes).
- Remove the Paper: Once the adhesive has dissolved, use a scraper to peel off the wallpaper. Wipe away any remaining residue with a damp cloth.
Why It Works:
Chemical removers target the adhesive directly, reducing the effort required to strip the paper. They’re especially helpful for modern wallpapers with strong adhesives.
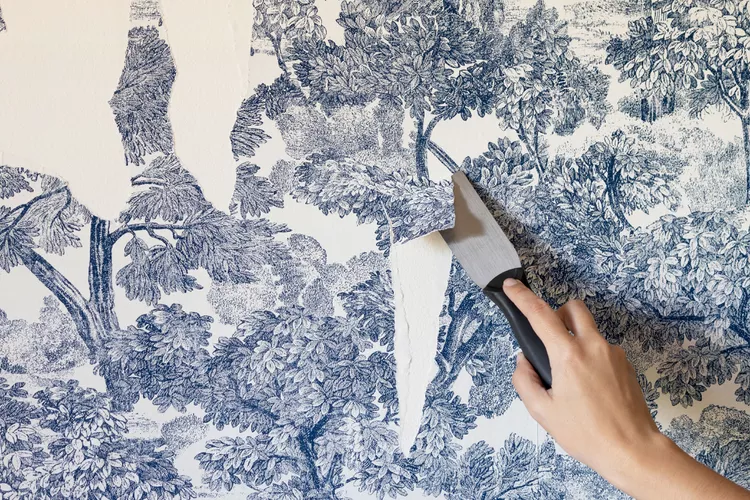
4. Dry Stripping Method: For Loose or Peeling Paper
If your wallpaper is already peeling or loose, dry stripping might be all you need. This no-fuss method skips water and chemicals entirely, relying solely on manual labor.
What You’ll Need:
- A putty knife or scraper
- A utility knife (optional)
- Sandpaper (for residual adhesive)
Steps:
- Start at a Corner: Find a loose edge or use a utility knife to lift a corner of the wallpaper.
- Peel It Back: Gently pull the paper downward at a sharp angle. If it resists, switch to a different section or use a scraper to assist.
- Deal with Residue: After removing the paper, sand down any leftover adhesive until the wall is smooth and ready for painting or new wallpaper.
Why It Works:
This method is perfect for walls where the adhesive has weakened over time. While it won’t work for every situation, it’s worth trying before moving on to wetter techniques.
Tips for Success: Making Wallpaper Removal Easier
No matter which method you choose, here are some additional tips to make the process smoother:
- Start Small: Work in manageable sections rather than tackling the entire wall at once. This prevents the adhesive from drying out before you finish.
- Protect Your Walls: Avoid gouging the drywall by using a flexible scraper and applying gentle pressure.
- Clean as You Go: Wipe down the wall with a damp cloth after removing each section to remove excess adhesive and prepare it for priming or painting.
- Be Patient: Wallpaper removal can be tedious, but rushing often leads to mistakes. Take breaks when needed to stay focused and energized.
Final Thoughts: A Fresh Start Awaits
Removing wallpaper may not be the most glamorous part of home improvement, but it’s a crucial step toward achieving the look you desire. By choosing the right method for your specific type of wallpaper and adhesive, you can save time, energy, and frustration.
Through my own experiences, I’ve learned that preparation and patience are key. Whether you opt for soaking, steaming, chemical solutions, or dry stripping, the satisfaction of revealing a clean, blank canvas makes all the effort worthwhile. And once the old wallpaper is gone, you’ll have endless possibilities for transforming your space—whether that means fresh paint, new wallpaper, or something entirely different.
So roll up your sleeves, gather your supplies, and tackle that wallpaper with confidence. With these four easy methods, you’ll be well on your way to creating a refreshed and revitalized room!